An iTunes Connect account allows you to self-publish on Apple Books. Your ebooks can then be purchased and read on all iOS devices and macOS computers.
Getting Started
Apple Books for Authors describes the process of creating an account and publishing your ebook. Please refer to this for full instructions.
The first thing to do is sign up for an iTunes Connect account. You might find the tax information for non-US authors useful at this point.
Once your account has been set up you can publish your ebook.
Delivering your ebook to Apple Books
Apple Books uses the standard EPUB format for ebooks.
If you use a macOS computer you will need to download iTunes Producer. This is the application used to upload your final ebook to Apple Books.
If you use any other system such as Windows you can upload your final ebook via the web-based Publishing Portal. A full guide to using the Publishing Portal is available on the Apple Books for Authors site.
Using iTunes Producer (macOS only)
iTunes Producer splits ebook processing into three sections:
1: Details
In the details section we enter information such as the book title, sub-title, author, publication date and ISBN.
We also provide a separate cover image which is at least 1400 pixels on the shortest side, in the RGB colour space, and in JPEG or PNG format.
Up to five optional screenshots can be provided. These should be created using Books on the iPad and saved in the RBG colour space as JPEG or PNG files.
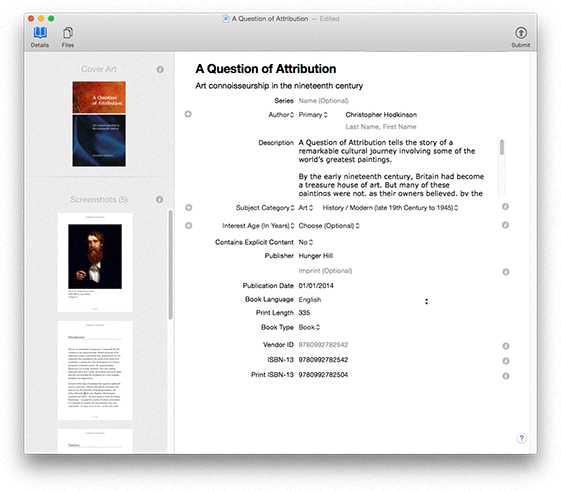
Book detail will include the following:
- ISBN: An International Standard Book Number is a unique 13 digit number used to identify your book. This can only be entered during the initial delivery phase, so make sure you get it right.
- Title and Subtitle.
- Publisher.
- Imprint
- Contributors, including author.
- Description: Similar to a dust cover or back cover description.
- Publication Date
Subject Category
You must categorise your book using standard category schemes such as BISAC, BIC2 and CIL. Usually you will choose a primary category, such as Architecture, then a secondary category, such as Landscape.
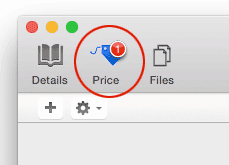
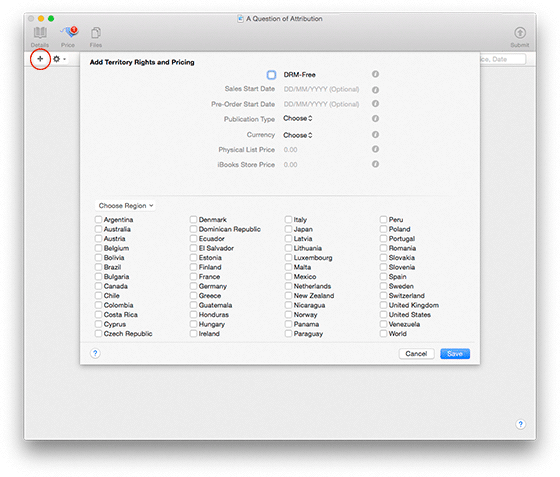
2: Price
The second section in iTunes Producer is where you set pricing:
Set your publication type, base currency and price. (You can include the print price if appropriate.) Then select the countries to sell in:
3: Files
The third section in iTunes Producer is where you provide the actual files for delivery:
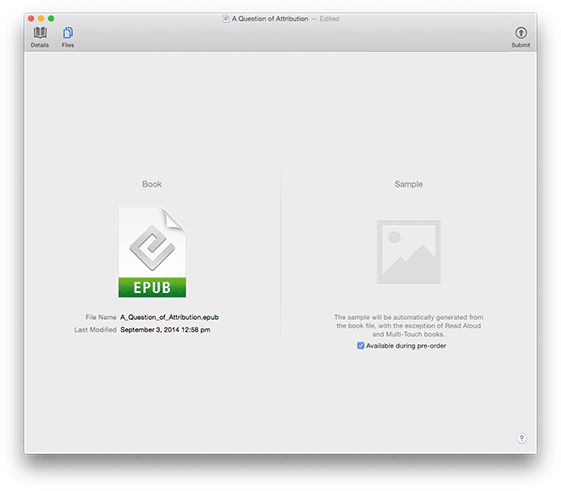
Book
This is the actual EPUB format ebook file. This is what I will provide.
Sample
A sample will be generated automatically, but you can supply your own for more control.
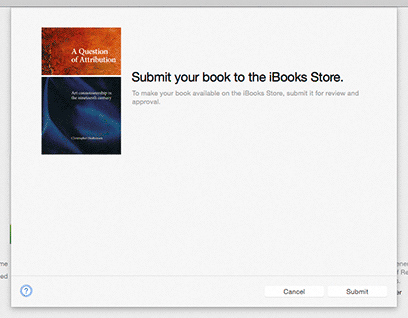
4: Delivery
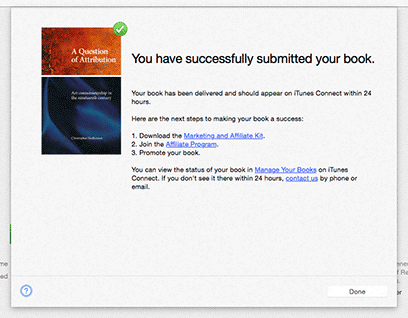
You can now submit your ebook to Apple:

The ebook will be processed and submitted to Apple. The upload status and any errors will be displayed here. Please note that it can take a while for the file to upload and process.

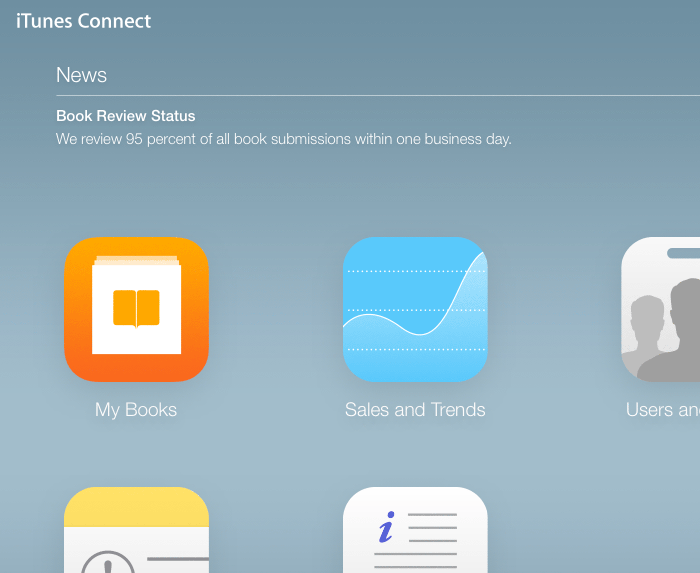
After submitting the book to Apple you will be able to log into the iTunes Connect website and to provide tax and banking details:
Please note that iTunes Connect publishing options may change, so check official documentation before delivering your book.